
There is an old line in this trade that prep is eighty percent of the job. It gets repeated so often that people stop hearing it, which is a shame, because the ratio is close to right and the consequences of ignoring it are total. A perfect pour over a bad profile fails. A mediocre pour over a correct profile usually survives.
Chris says the same thing to every crew that comes through the shop: you do not get paid for the resin, you get paid for the bond. Everything below is about buying that bond honestly.
What the coating is actually holding onto
Resin does not glue itself to concrete the way most people picture. There is some chemical interaction at the surface, but the load bearing part of the connection is mechanical. The coating flows into open pores and the peaks and valleys you cut into the slab, cures hard inside them, and now you have thousands of tiny anchors resisting anything that tries to pull the film off.
Which means the surface has to be open and it has to be sound. Open, because a closed troweled surface has almost nowhere for resin to go. Sound, because the coating can only be as strong as the concrete it is keyed into. Grind through the weak laitance layer at the top of a hard troweled slab and you find real concrete underneath. Leave that layer in place and the coating bonds beautifully to a skin that is going to let go of the slab it is sitting on. The floor comes up with a thin gray wafer stuck to the back of it, and every installer who has been at this a while has seen that exact picture.
Contamination is the other half. Curing compounds, old adhesive, silicone from a shop that ran a body business, oil that soaked in over twenty years. Grinding removes most of it. Oil is the exception, because it has traveled down into the pore structure and comes back up under the heat of curing resin. Deep oil needs a degreaser and time, or a mechanical removal down past where it went, and on some slabs the honest answer is that this floor is not a candidate.
CSP profiles one through nine and what wants which
The International Concrete Repair Institute publishes a set of nine concrete surface profile chips, CSP 1 through CSP 9, running from barely textured to heavy scarification. They are physical rubber comparison chips, and they exist because “roughed up” means something different to every person on a jobsite.
The governing principle is simple: the thicker the system, the deeper the profile it wants. A thin film has nowhere to hide in a deep profile and will telegraph every ridge you cut. A thick mortar system on a shallow profile has nothing to grab.
- CSP 1 to 2 is acid etch or light sanding territory, appropriate for thin sealers and penetrating products under about five mils. Almost never right for a real resinous floor.
- CSP 2 to 3 is a light to medium grind, and it is where most thin film epoxy and single coat polyaspartic work lives, roughly five to ten mils total build.
- CSP 3 to 4 covers the majority of what installers actually build day to day: flake systems, quartz broadcast, self leveling epoxy in the ten to forty mil range.
- CSP 4 to 6 is shot blast territory for heavier builds, thick self levelers and troweled systems past about forty mils.
- CSP 6 to 9 belongs to urethane cement and mortar systems at a quarter inch and up, and typically means shot blasting or scarifying rather than grinding.
Two practical notes on that range. First, the number that matters is the one printed in the product data sheet, not the one in your head from the last brand you used. Second, a urethane cement mortar at three sixteenths of an inch over a CSP 3 grind will fail, and it will fail expensively, because you have built a rigid slab on top of a slab with almost nothing tying them together.
Grinding, shot blasting, and why etching keeps letting people down
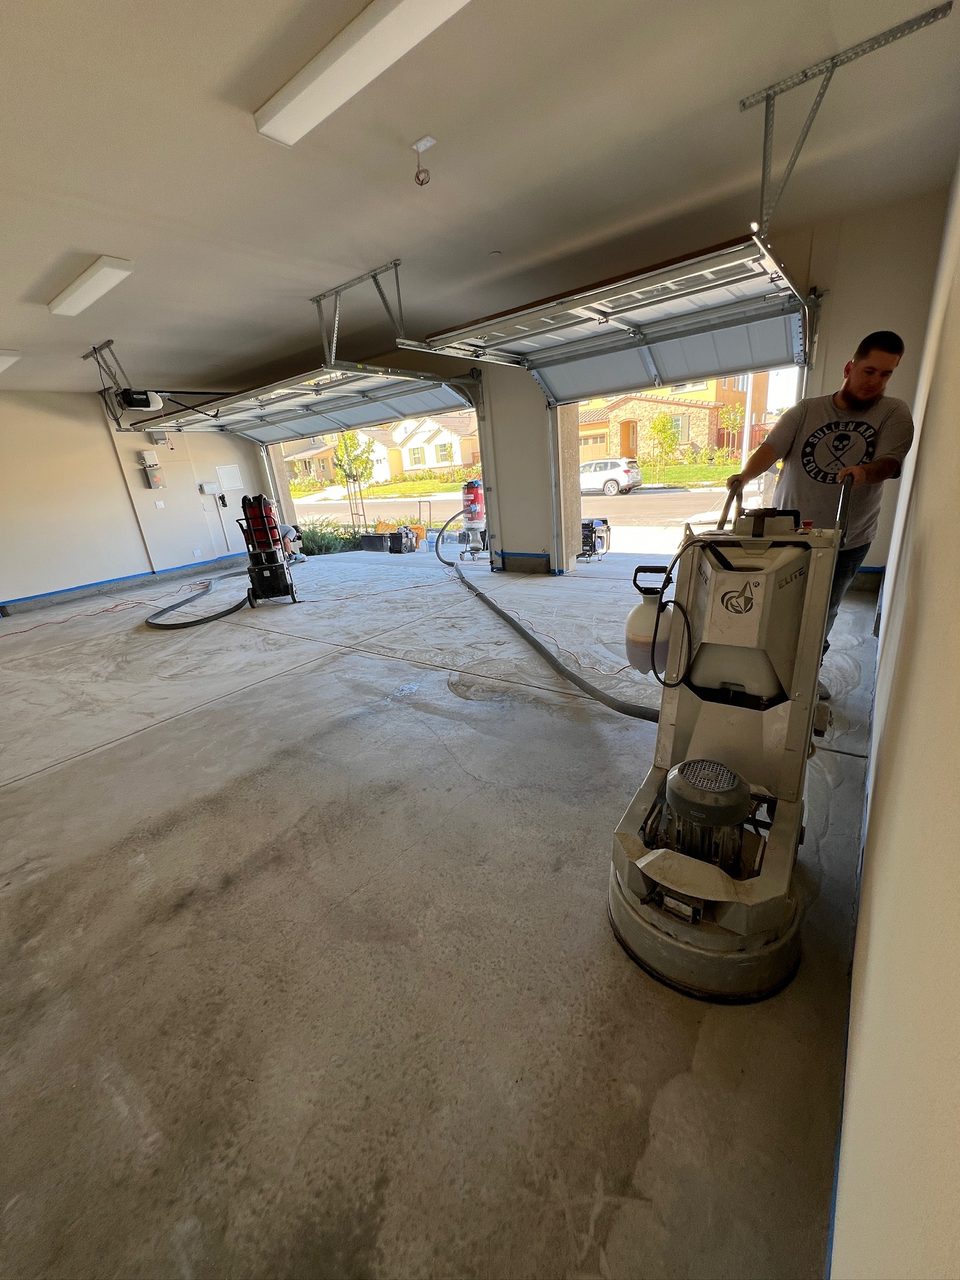
Diamond grinding is the default for good reasons. It is controllable, it works indoors without wrecking the space, it flattens as it profiles, and it opens the surface without shocking the concrete. It reaches CSP 1 through about 4 depending on tooling, which covers most decorative work. It is also the only one of the three that can level a floor while it profiles it, which matters more than people expect on a slab with trowel waves in it.
Shot blasting throws steel shot at the slab and vacuums it back. It moves fast over open square footage, it produces CSP 3 through 9 depending on shot size and travel speed, and it is the correct call on big commercial floors and on any system thick enough to need real tooth. What it does not do is flatten. It follows the contour it is given, so a wavy slab stays wavy. It also leaves a directional pattern that can show through thin films, which is why a lot of crews shot blast for the aggregate and then hit it with a grinder to knock the pattern down.
Acid etching is the one that keeps generating failures, and it deserves a straight answer about why. Acid dissolves cement paste. It does not remove contamination, it does not remove weak laitance in any reliable way, and it cannot flatten. Best case on a clean, sound, uncoated slab it opens a CSP 1 to 2 that some very thin products can live with. Real case is a residential garage with a sealed troweled surface, a homeowner or a low bid crew washes it with an acid solution, it foams, it looks like something happened, and it dries to a slightly lighter shade of the same closed surface. Then there is neutralization and rinsing, which has to be complete, because acid residue left in the pores attacks the coating from underneath. And that rinse water goes somewhere, and in California, where it goes is a regulated question.
Anybody who tells you a garage floor is ready to coat because they etched it is selling you a failure with a delay built in. If you are taking over that job, you still have to grind it. The etch bought you nothing except an extra step of drying time.
Picking a diamond bond for the slab in front of you
This is where installers lose the most money in tooling, and it is entirely fixable with one idea: the bond wears against the concrete, so a hard slab needs a soft bond and a soft slab needs a hard bond. It reads backward the first time and it is the most important sentence in this section.
Hard concrete, a power troweled slab that is dense and polished looking, will not wear a hard bond fast enough. The diamonds get dull, glaze over, stop cutting, and you push the machine around burnishing the floor while the segments last forever and accomplish nothing. A soft bond wears away steadily on that slab, constantly exposing fresh diamond, and it cuts.
Soft concrete, an older or sandy or abrasive slab, chews through a soft bond in an afternoon. You will watch a set of segments disappear and the cost per square foot go through the roof. A hard bond holds its diamonds in place long enough to make the job pay.
Grit sequence is the other half. Start with metal bond segments coarse enough to remove what needs removing, usually somewhere in the sixteen to thirty grit range for a real coating removal or a heavy profile, then step up. Do not skip steps by more than double or you will be chasing scratch patterns you cannot see until the resin goes down and makes them obvious. For coating prep, most crews stop well short of a polish. You want texture, not shine.
If you are unsure what you are walking into, and on a slab you have never touched nobody really is, test a corner. Run a set for five minutes and look at both the floor and the segments. Segments barely worn and the floor barely cut means you are too hard. Segments visibly gone means too soft. We keep a working range of diamond tooling and prep consumables on the shelf in Tracy for that reason, and if you are set up for a job without a machine to match, there is a grinder rental option so you are not buying equipment to win one bid.
Checking your profile instead of guessing at it
Buy the ICRI chip set. It is a real tool, it lives in the truck, and it settles arguments. The method is to hold the chip flat against the ground surface and compare by touch as much as by eye. Run a fingertip across the chip, then across the slab. Your finger is better at this than your eyes are, particularly under jobsite lighting that flattens everything out.
Check multiple spots. A grinder does not cut evenly across a floor. Edges get a hand grinder or an edger and almost always end up shallower than the field, corners get whatever you could reach, and the middle of a long pass tends to be the deepest. If your field reads CSP 3 and your perimeter reads CSP 1, the perimeter is where the floor is going to release, and the perimeter is where the customer’s eye goes first.
Photograph the profile with the chip in the frame before you coat. Costs nothing. Two years later when a floor is being argued about, a dated photo of a chip against the slab is the difference between a conversation and a claim. This is one of the habits we drill in the training academy, because documenting the boring parts is what protects a crew when something unexpected happens.
Dust, silica, and the rules that actually get enforced
Grinding concrete generates respirable crystalline silica, and the exposure limit is a federal standard with real teeth. Table 1 of the OSHA silica rule covers handheld grinders and walk behind equipment, and if you follow the listed control methods, a commercial dust extractor sized to the tool with a filter cleaning mechanism and correct shrouding, you are compliant without doing your own exposure monitoring. Off that path and you owe an air monitoring program, which nobody wants.
The equipment reality is that an undersized vacuum is worse than useless. It fills, loses suction, and now you have dust escaping while you believe you are protected. Match the extractor CFM to the machine, run a HEPA filter, use the pre separator, and empty it before it is full rather than after. Change the filters on a schedule you actually keep.
There is a business argument alongside the safety one. Dust that gets away from you settles on every surface in the building, and on an occupied commercial job that becomes a cleanup bill and an unhappy client. Containment done properly is faster than the alternative, which is two people with rags at eleven at night.
Gouges, pinholes, and knowing when to patch
Once the slab is ground and vacuumed you can finally see it, and it usually looks worse than it did before you started. That is normal. Grinding exposes what the trowel finish was hiding.
Cracks that are dormant get routed out and filled with a rigid polyurea or epoxy crack filler, overfilled slightly, then ground flush once cured. Cracks that are still moving are a different animal, and filling them rigid just moves the crack into your coating a few inches over. Moving cracks want a joint treatment or a flexible detail, and sometimes an honest conversation about the fact that it will telegraph.
Spalls, chips, and gouges deeper than about an eighth of an inch get patched with a cementitious or epoxy mortar, feathered and reground. Anything shallower than that is usually cheaper to handle in the build coat, especially on a flake or quartz system where the broadcast is going to carry thickness anyway.
Pinholes and bugholes are their own category. Trying to patch a floor full of them individually is a bad afternoon. The answer is a prime and fill pass: a low viscosity epoxy primer squeegeed tight so it wicks in, then a second pass while the first is still open, or a slurry of primer and fine silica broadcast into the wet. It fills the voids in one operation and it stops the outgassing that turns those same voids into craters when the sun hits the slab and air pushes up through your build coat.
Which brings up the last thing on the list. Prime when the slab is cooling, not warming. A slab heating up in the afternoon pushes air out through every pore it has, and that air comes up through wet resin as bubbles. Late day, evening, early morning on a warming slab is asking for it. Watch which direction the temperature is heading, then decide when to prime.
Questions we get at the counter about prep
Q. Can I skip the grind if the slab is brand new and clean? No, and new slabs are actually one of the tougher cases. A fresh power troweled surface is the most closed surface in the trade, and it is usually carrying a curing compound on top of that. Clean is not the same as open. Grind it.
Q. What CSP should I be cutting for a full flake floor? Most flake systems land at CSP 3, sometimes CSP 4 if the build is on the heavy side. Confirm against the data sheet for the specific primer, because that is the layer doing the bonding and its requirement is the one that governs. Our flake system data sheets all state it plainly.
Q. My segments are barely wearing and the floor is not cutting. What is wrong? Your bond is too hard for that concrete. Dense troweled slabs glaze a hard bond almost immediately. Switch to a softer bond so the matrix wears back and keeps exposing fresh diamond. Nothing else will fix it, and running the machine longer just polishes.
Q. Do I need to profile the walls for a cove base? Yes, and it is skipped constantly. Cove base is a coating like any other and it needs mechanical tooth on the vertical surface. On concrete or block, grind or sand it. On drywall, you need the right primer and a mechanical fastener detail, because a cove sitting on paper face is going to peel eventually.
Q. How long can a ground slab sit before I have to coat it? Ideally you prime the same day. An open profile is a sponge for airborne dust, foot traffic, and whatever else is happening in the building, and moisture will move back into it overnight. If more than a day passes, vacuum thoroughly and check for anything that landed on it. If a week passes, plan on a light regrind.
Working out tooling for a slab you have not cut yet, or trying to decide whether a floor is worth bidding at all? Talk it through with the owner before you commit tooling money. Chris answers at (209) 208-4656, or put the details and a few photos into the contact form and we will tell you straight what that slab is going to take.